如何在Laravel项目中创建反馈模块,并在提交消息时接收Slack通知。
如何在Laravel项目中创建反馈模块,并在提交消息时接收Slack通知。
一个示例Laravel项目可以在本Github 仓库中找到。更多关于Capsules的信息,请访问Capsules或X。
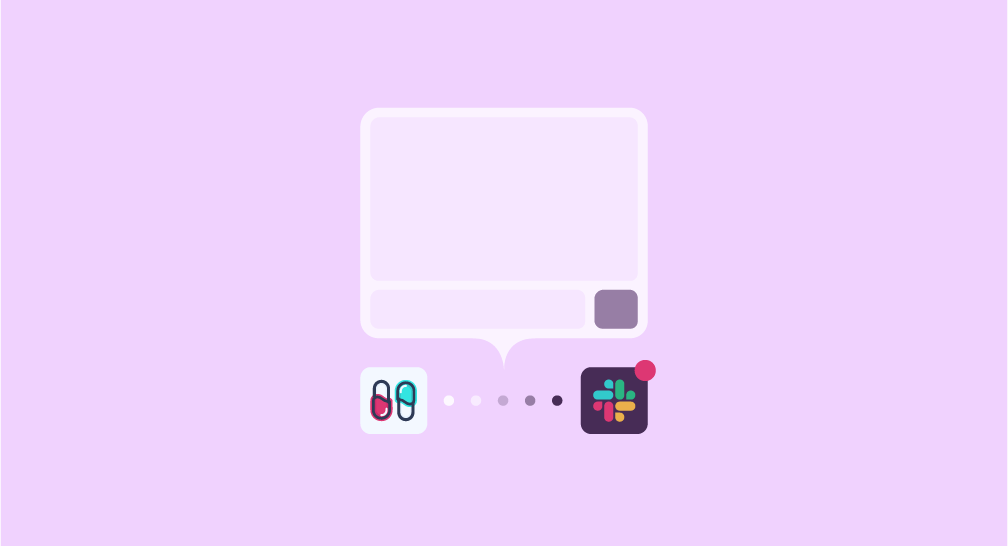
在网站上遇到联系表单或电子邮件地址是很常见的,允许用户联系网站管理员。这些表单通常要求用户提供电子邮件地址、主题和标题。本文提出了一种更开放的无名替代方案,取代了这种标准格式
按钮提供对包含反馈字段的表单的访问,以及可选的电子邮件地址字段,如果希望收到消息回复的话。提交后,将自动生成Slack通知通知管理员。不会生成电子邮件,且数据不会存储在数据库中。
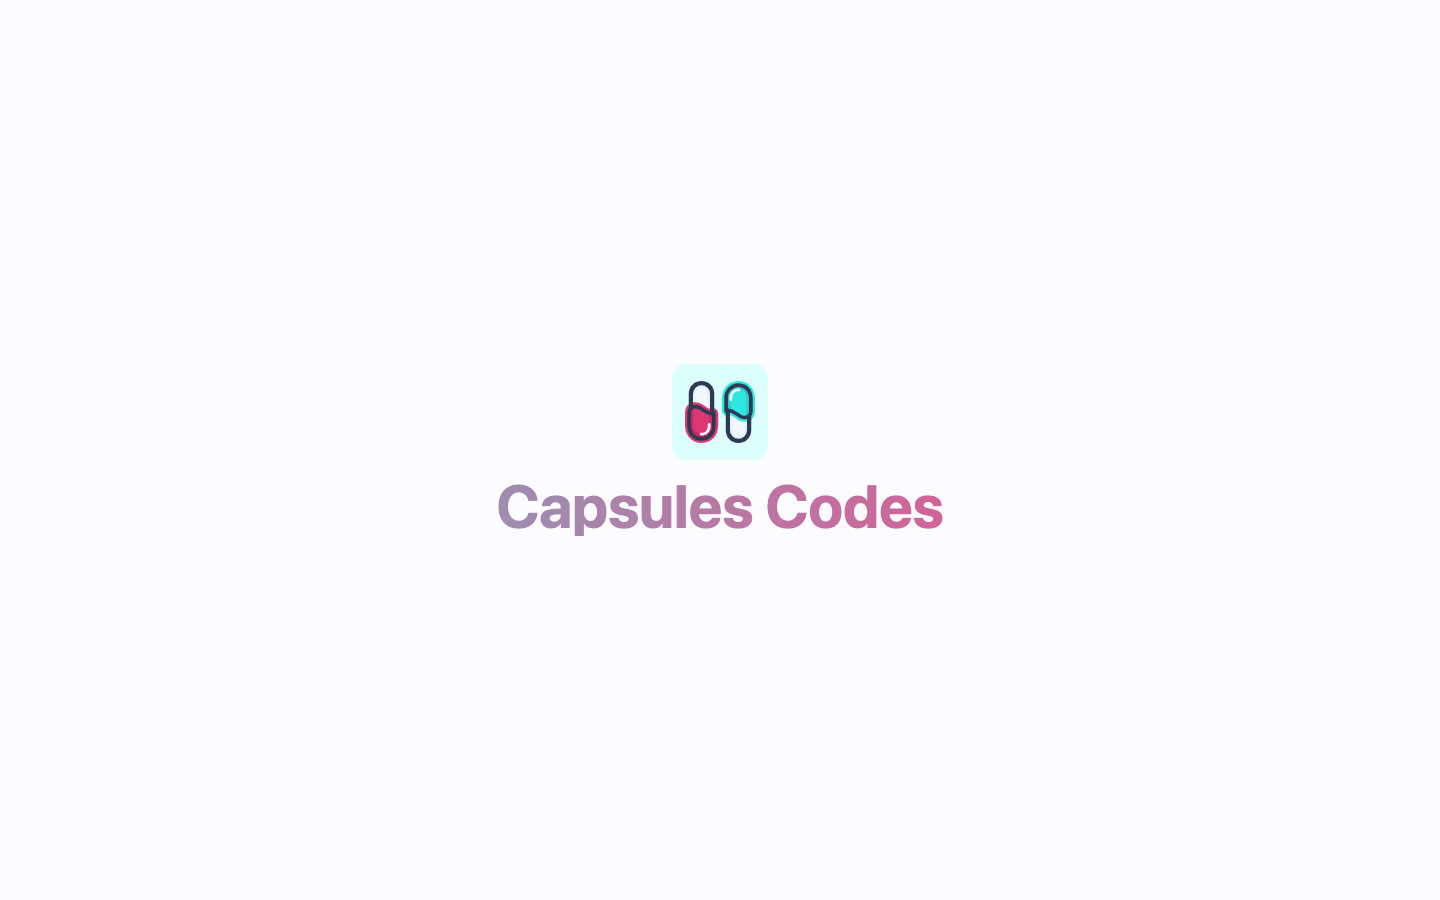
最初,我们在空的Laravel项目中只配置了一个路由和一个页面。
routes/web.php
<?php

use Illuminate\Support\Facades\Route;
use Inertia\Inertia;


Route::get( '/', fn() => Inertia::render( 'Welcome' ) );
/resources/js/pages/Welcome.vue
<script setup>

import logotype from '/public/assets/capsules-logotype-background.svg';

</script>

<template>

    <div class="w-screen h-screen flex flex-col items-center justify-center text-center bg-primary-white">

        <img class="w-24 h-24" v-bind:src="logotype">

        <h1 class="mt-4 text-6xl font-bold select-none header-mode" v-text="'Capsules Codes'" />

    </div>

</template>
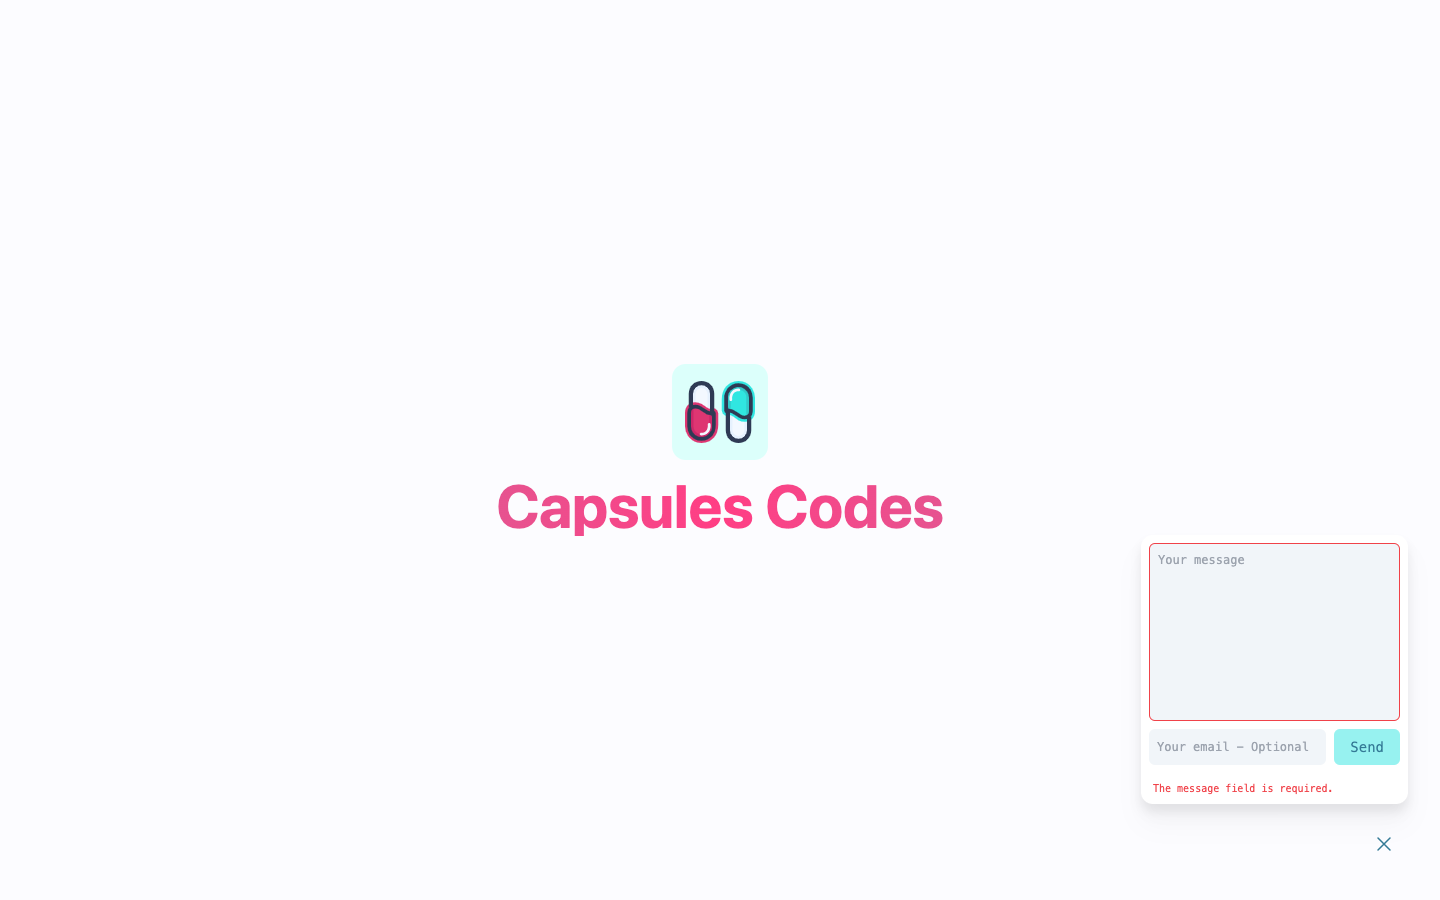
反馈组件可以完全包含在一个Vue文件中。HTML结构包括一个按钮和一个表单。以下是模块的内容。
resources/js/components/Feedback.vue
<script setup>
import { ref } from 'vue';
import { router } from '@inertiajs/vue3';
import logotype from '/public/assets/capsules-logotype.svg';
const isOpen = ref( false );
const isSent = ref( false );
const errors = ref( {} );
const message = ref( '' );
const email = ref( '' );
function toggle()
{
if( ! isOpen.value )
{
message.value = '';
email.value = '';
isSent.value = false;
errors.value = {};
}
isOpen.value = ! isOpen.value;
}
function submit()
{
errors.value = {};
const data = email.value ? { email : email.value, message : message.value } : { message : message.value };
router.post( '/feedbacks', data, { onError : error => { errors.value = error; }, onSuccess : () => { isSent.value = true; } } );
}
</script>
<template>
<div class="m-8 flex flex-col-reverse items-end space-y-reverse space-y-4">
<button class="w-12 h-12 flex items-center justify-center" v-on:click="toggle()">
<div v-show="! isOpen" class="w-full h-full rounded-xl bg-white flex items-center justify-center drop-shadow-2xl hover:bg-primary-blue hover:bg-opacity-5"><img class="h-8 w-8" v-bind:src="logotype"></div>
<div v-show="! isOpen" class="absolute top-0 left-0 w-full h-full rounded-xl bg-white flex items-center justify-center animate-ping opacity-50"><img class="h-8 w-8" v-bind:src="logotype"></div>
<svg v-show="isOpen" viewBox="0 0 24 24" stroke-width="1.5" stroke="currentColor" class="w-6 h-6 text-primary-blue"><path stroke-linecap="round" stroke-linejoin="round" d="M6 18L18 6M6 6l12 12" /></svg>
</button>
<div v-if="isOpen">
<div v-if="! isSent" class="font-mono rounded-xl bg-white drop-shadow-xl ">
<div class="p-2">
<form class="flex flex-col" v-on:submit.prevent="submit()">
<label for="message" hidden />
<textarea
id="message"
class="mb-2 p-2 outline-none rounded-md resize-none text-xs bg-slate-100"
v-bind:class="{ 'border border-solid border-red-500 text-red-500' : errors && errors[ 'message' ] } "
type="text"
cols="30"
rows="10"
v-bind:placeholder="'Your message'"
v-model="message"
/>
<div class="flex">
<label for="email" hidden />
<input
id="email"
class="px-2 grow outline-none rounded-md text-xs bg-slate-100"
v-bind:class=" { 'border border-solid border-red-500 text-red-500' : errors && errors[ 'mail' ] } "
type="text"
v-bind:placeholder="'Your email - Optional'"
v-model="email"
>
<button
class="ml-2 px-4 py-2 inline-flex items-center rounded-md text-sm font-medium text-primary-blue bg-primary-blue bg-opacity-50 hover:bg-opacity-60"
type="submit"
>
<p v-text="'Send'" />
</button>
</div>
</form>
<div>
<p v-for=" ( error, key ) in errors " v-bind:key="key" class="first:mt-4 ml-1 text-[10px] text-red-500" v-text="error" />
</div>
</div>
</div>
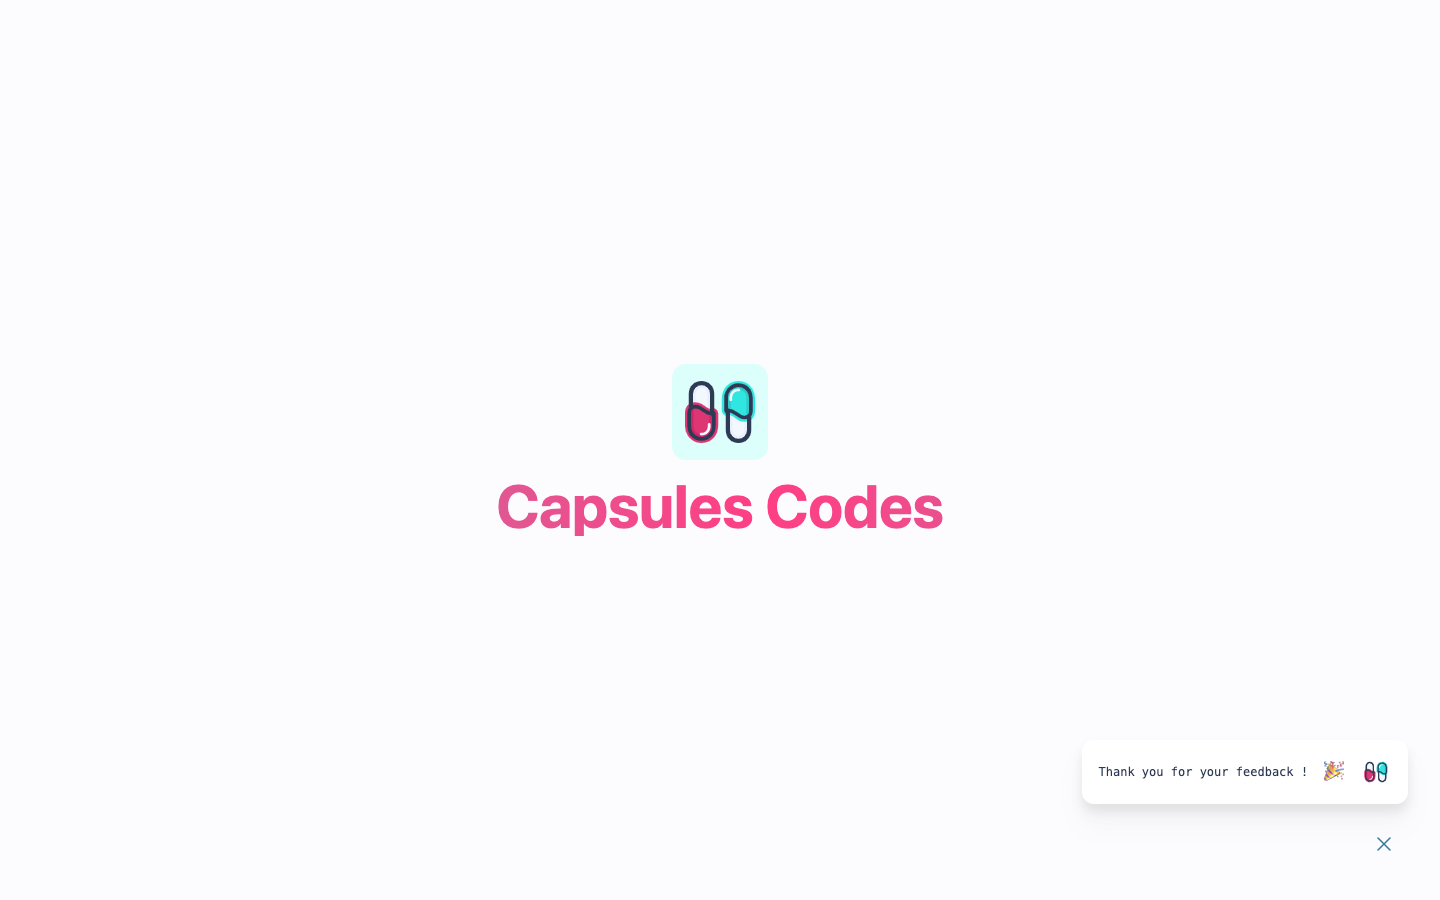
<div v-else class="font-mono p-4 flex items-center justify-center space-x-4 bg-white rounded-xl drop-shadow-xl">
<p class="w-full text-center text-xs text-primary-black" v-text="'Thank you for your feedback !'" />
<p v-text="'🎉'" />
<img class="h-8 w-8" v-bind:src="logotype">
</div>
</div>
</div>
</template>
该组件代表了一个按钮,当点击时,通过isOpen变量显示一个表单。当点击“发送”按钮时,会调用submit()方法,向/feedbacks路由发送POST请求。如果一切正常,isSent变量变为true,表单将被感谢信息替换。否则,错误的字段将以红色突出显示。
现在,是时候将此组件添加到欢迎页面了。
resources/js/pages/Welcome.vue
<script setup>

import Feedback from '/resources/js/components/Feedback.vue';
import logotype from '/public/assets/capsules-logotype-background.svg';

</script>

<template>

    <Feedback class="fixed z-10 bottom-0 right-0" />

    <div class="w-screen h-screen flex flex-col items-center justify-center text-center bg-primary-white">

        <img class="w-24 h-24" v-bind:src="logotype">

        <h1 class="mt-4 text-6xl font-bold select-none header-mode" v-text="'Capsules Codes'" />

    </div>

</template>
从现在开始,导入Feedback组件并将其放置在屏幕的右下角。现在客户端模块正在运行,是时候创建路由、实现验证并将数据发送到Slack了。对于本文,没有必要创建特定的控制器。
app/Http/FeedbackRequest.php
<?php

namespace App\Http\Requests;

use Illuminate\Foundation\Http\FormRequest;


class FeedbackRequest extends FormRequest
{
    public function rules() : array
    {
        return [
            'message' => [ 'required', 'min:1', 'max:499' ],
            'email' => [ 'sometimes', 'email' ],
        ];
    }
}
FeedbackRequest允许在数据未正确发送时返回错误。
routes/web.php
<?php

use Illuminate\Support\Facades\Route;
use Inertia\Inertia;
use App\Http\Requests\FeedbackRequest;


Route::get( '/', fn() => Inertia::render( 'Welcome' ) );

Route::post( 'feedbacks', function( FeedbackRequest $request ){} );
下一步是将Laravel项目连接到Slack工作区。为此,有一个可用的Laravel包:laravel/slack-notification-channel。
composer require laravel/slack-notification-channel
此外,需要通过此链接创建Slack App。点击创建新应用 > 从头开始。然后,插入一个应用名称并选择您的Slack工作区。将出现一个基本信息页面。选择入站Webhooks功能并将其启用。点击添加工作区的新Webhook并选择接收通知的通道。
以下格式的一个webhook现在可用:https://hooks.slack.com/services/{your-webhook-key}。
需要将此webhook添加到环境变量LOG_SLACK_WEBHOOK_URL中,它可以在配置文件config/logging.php中找到。
config/logging.php
'slack' => [
    'driver' => 'slack',
    'url' => env('LOG_SLACK_WEBHOOK_URL'),
    'username' => 'Laravel Log',
    'emoji' => ':boom:',
    'level' => env('LOG_LEVEL', 'critical'),
    'replace_placeholders' => true,
],
.env
LOG_SLACK_WEBHOOK_URL=https://hooks.slack.com/services/{your-webhook-key}
现在可以通过/feedbacks路由发送通知。
routes/web.php
<?php

use Illuminate\Support\Facades\Route;
use Inertia\Inertia;
use App\Http\Requests\FeedbackRequest;
use Illuminate\Support\Facades\Notification;
use App\Notifications\FeedbackReceived;


Route::get( '/', fn() => Inertia::render( 'Welcome' ) );

Route::post( 'feedbacks', fn( FeedbackRequest $request ) => Notification::route( 'slack', config( 'logging.channels.slack.url' ) )->notify( new FeedbackReceived( $request ) ) );
接下来只剩余创建FeedbackReceived通知。
app/Notifications/FeedbackReceived.php
<?php

namespace App\Notifications;

use Illuminate\Notifications\Notification;
use App\Http\Requests\FeedbackRequest;
use Illuminate\Notifications\Messages\SlackMessage;


class FeedbackReceived extends Notification
{
    private FeedbackRequest $request;

    public function __construct( FeedbackRequest $request )
    {
        $this->request = $request;
    }

    public function via() : array
    {
        return [ 'slack' ];
    }

    public function toSlack() : SlackMessage
    {
        $email = $this->request->email ?? 'Anonymous';

        return ( new SlackMessage )->content( "New Capsules Codes Feedback : \"{$this->request->message}\" by {$email}" );
    }
}
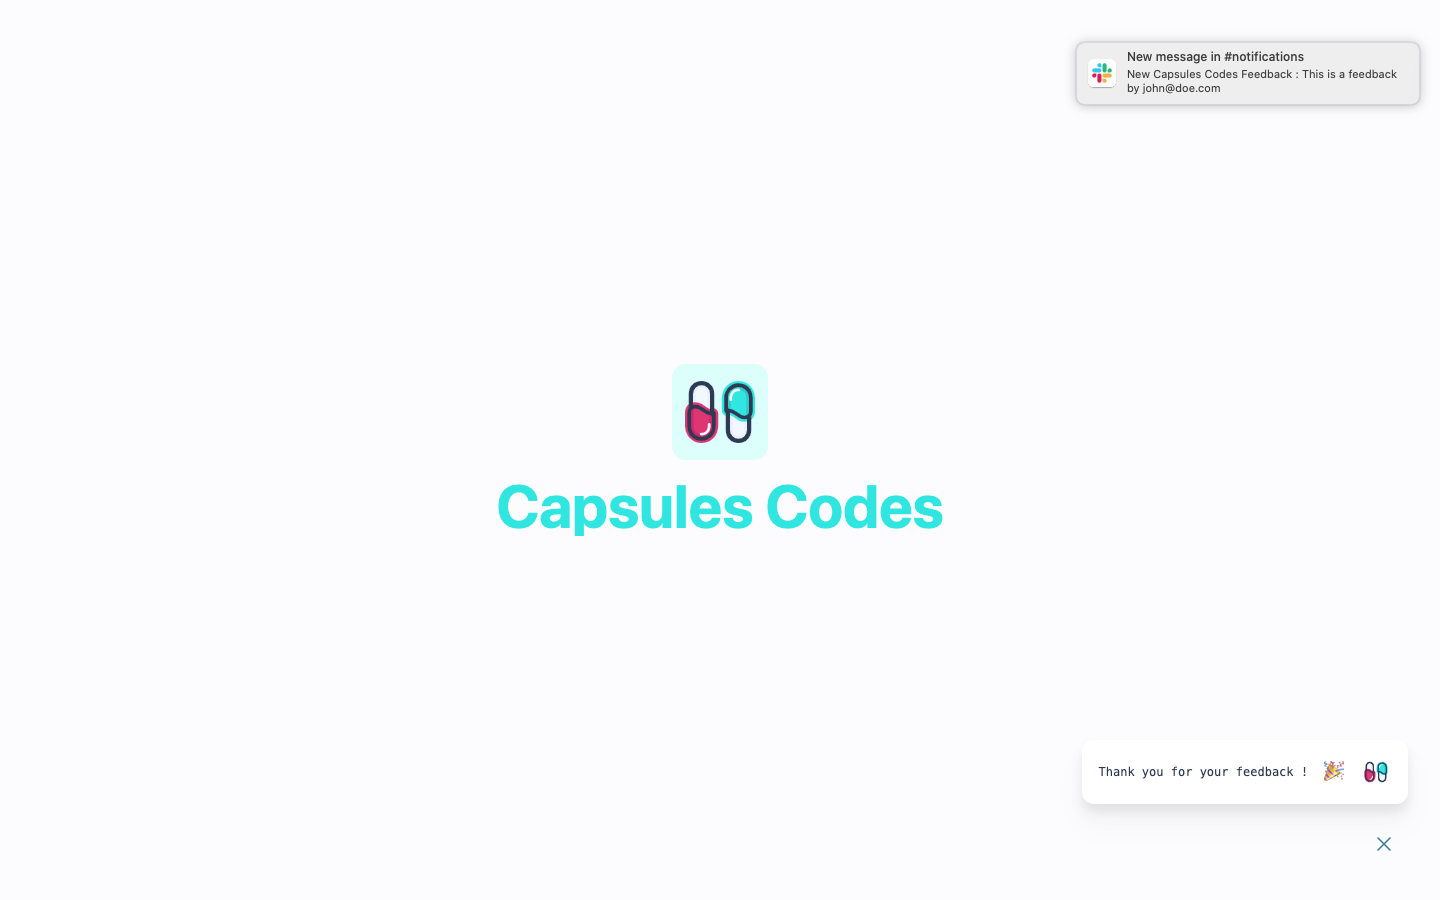
一个通知出现了!
很高兴有帮助。
driesvints, mho, cfyer 赞同这篇文章


 Laravel
  Laravel News
  Laracasts
  Laravel Podcast